
Introduction
Windows 365 Cloud PCs have revolutionized the way organizations deploy and manage virtual desktops. They provide users with the flexibility to access a full Windows experience from virtually anywhere, without the need for complex infrastructure. One default during the onboarding process of Cloud PCs is that each device connects to the internet via a different WAN IP address.
While this is generally acceptable in most scenarios, it presents a challenge when attempting to restrict access to enterprise applications based on specific WAN IP addresses. Many organizations prefer to lock down access to sensitive applications to ensure that only trusted devices from known IP addresses can connect (As one of many security measures, not as the only security measure).
In this blog post, I'll guide you through the process of addressing this challenge by configuring your Windows 365 Cloud PCs to connect to enterprise applications through a specific public IP address and with that configuring the conditional Access Policy to restrict an enterprise application to a public IP (again as one of many security measures).
By doing so, you can effectively lock down access to your applications and ensure that only authorized Cloud PCs are allowed to connect. (beside other CAs with compliant device etc.)
Now - Let’s jump right in!
🎯 Goals
Before we get into the nitty-gritty, let's set the stage. The goal of this post is to understand the whole configuration from Windows 365 to the Azure Network.
By the end of this post, you should have a clear understanding of:
- The initial configuration of Windows 365 and the Azure Network Connection
- Onboarding a Windows 365 Cloud PCs with the configured policies
- Understanding the (easy) network concept for the configuration
- Configuring the Azure Network with the NAT Gateway
🧩 Use Case
Here’s the real-world scenario that inspired this post. We encountered now many situations where the internal IT Department locks down some services to their external WAN-IP. This post is a response to that — sharing a practical and easy solution that you can apply in your own environment.
Example Use Case:
- Industry: Corporate, you name it...
- Challenge: SaaS Software which your tenant should be locked down to a WAN-IP e.g. Confluence Cloud as (Which you securely Log into the Enterprise Application with SSO over Entra ID 😉) with an IP Whitelisting
- Goal: Additionally to your On Premise WAN-IP, locking the resource down to the Windows 365 Cloud PCs that those users have access to the resources as well
Why does this matter? Because addressing this can extend your Whitelisting and extend the access to your SaaS Application
⚙️ Technical Description
Here comes the fun part — the step-by-step technical breakdown. Follow along to see how we approach this challenge and implement the solution.
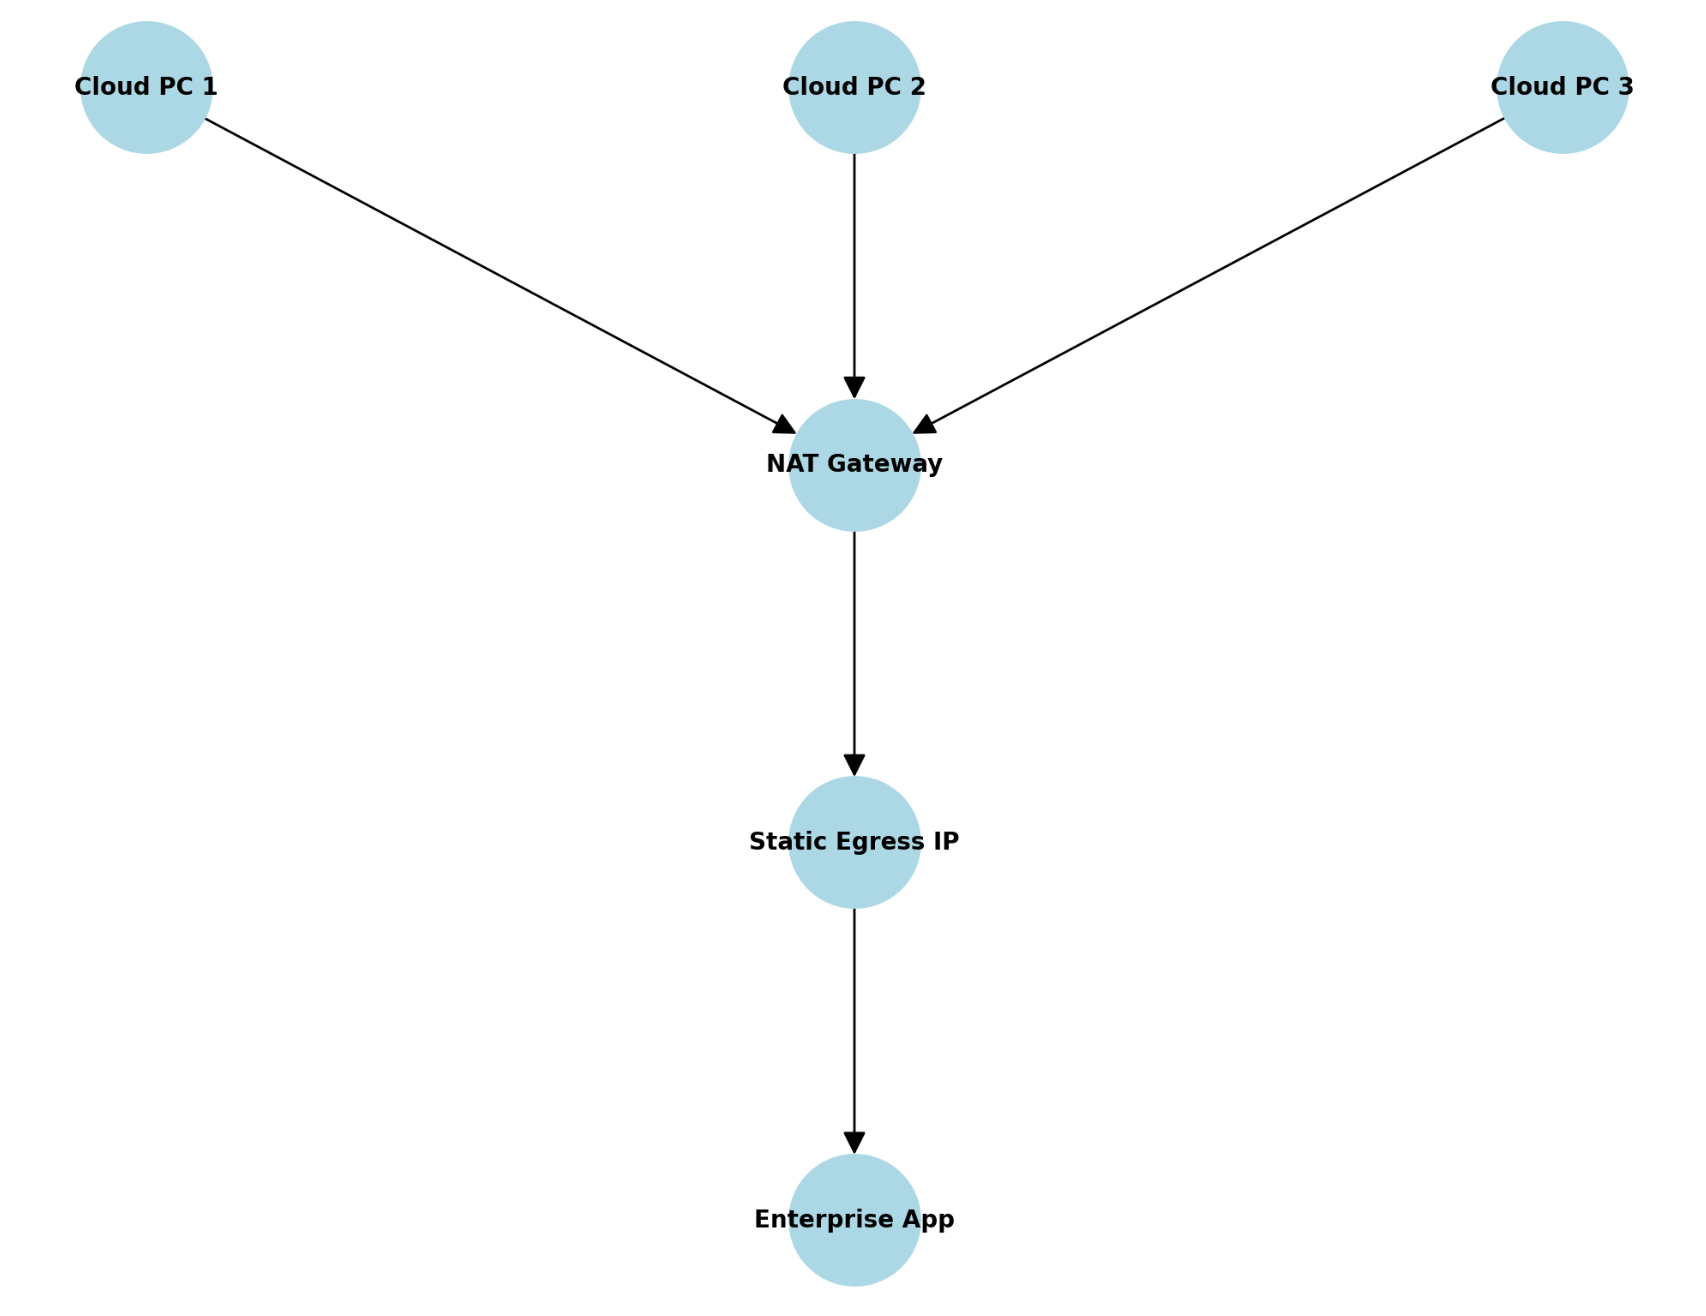
To understand and make it simpler to explain it, I made a very simple Overview, how this whole thing should work:
🔧 Step 1: Initial Azure configuration
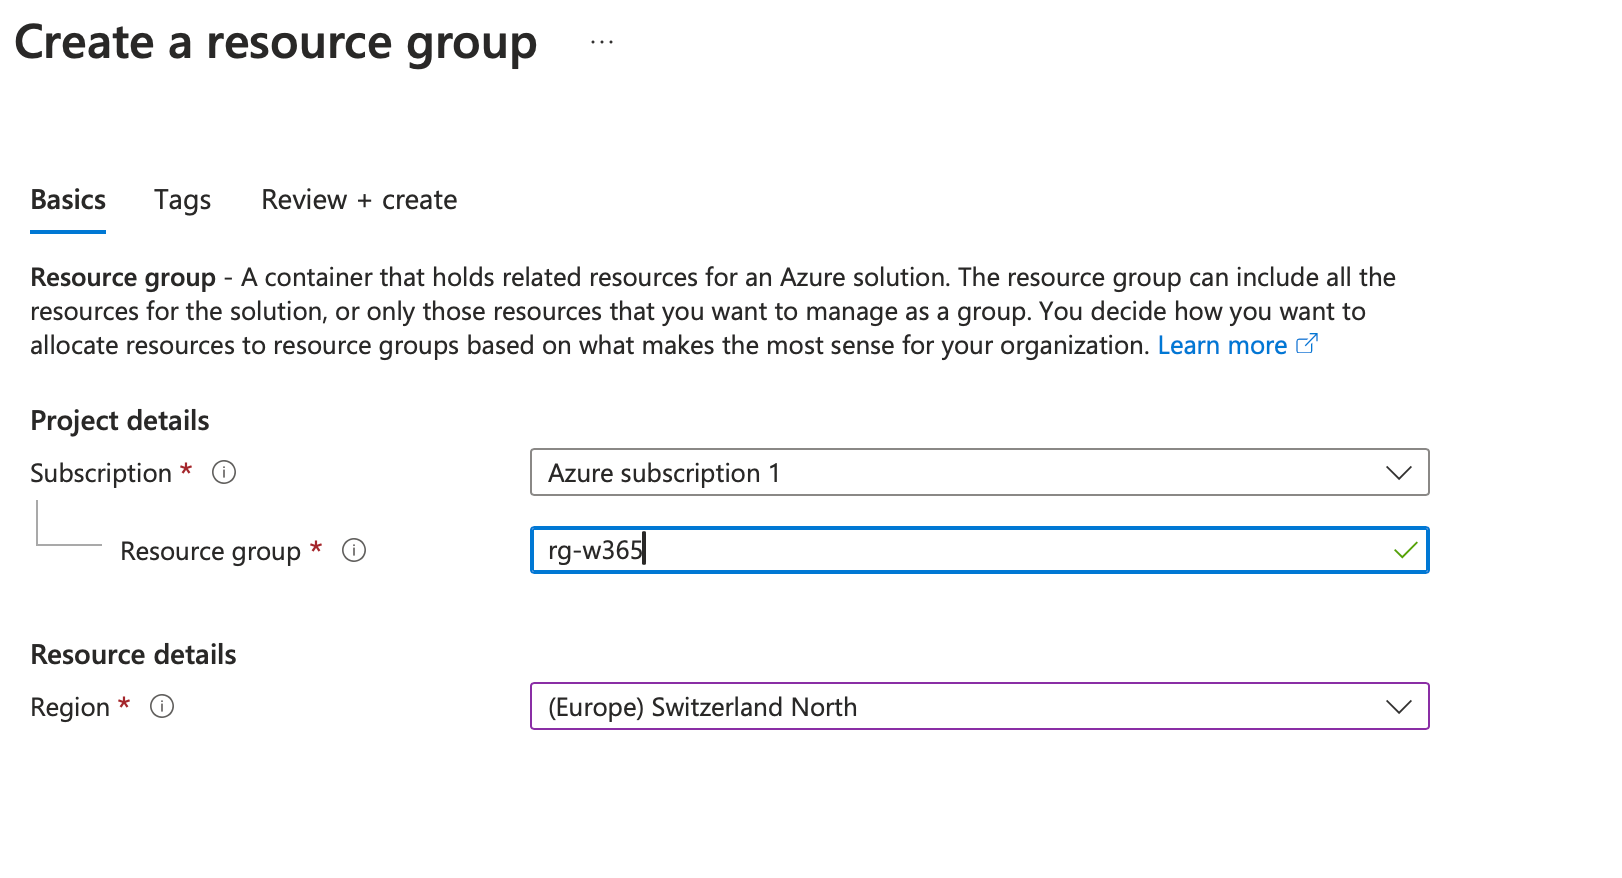
Navigate to the Azure portal > Resource group > Create
Navigate to Virtual Networks > Create
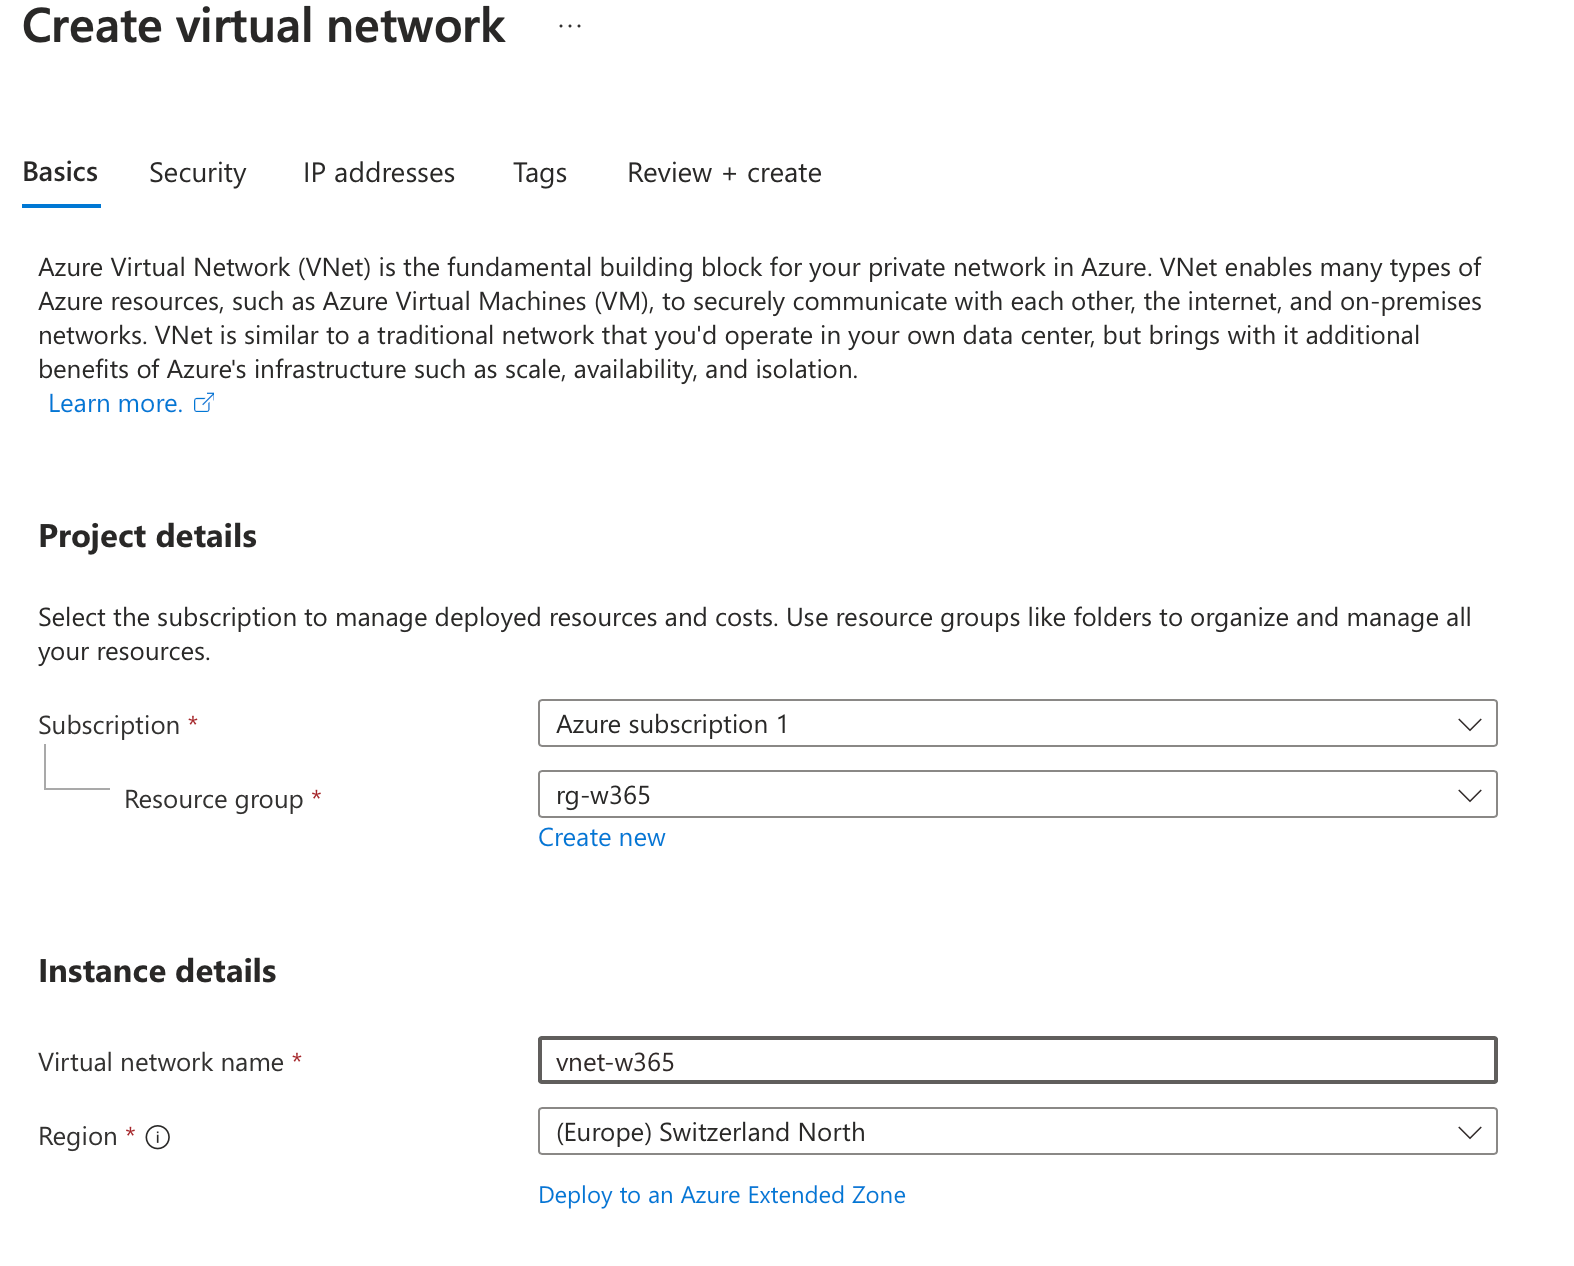
- Security can be configured as you wish
- IP addresses for the subnet can be configured as you wish, for our use case we do a /24 network with the default ip configuration
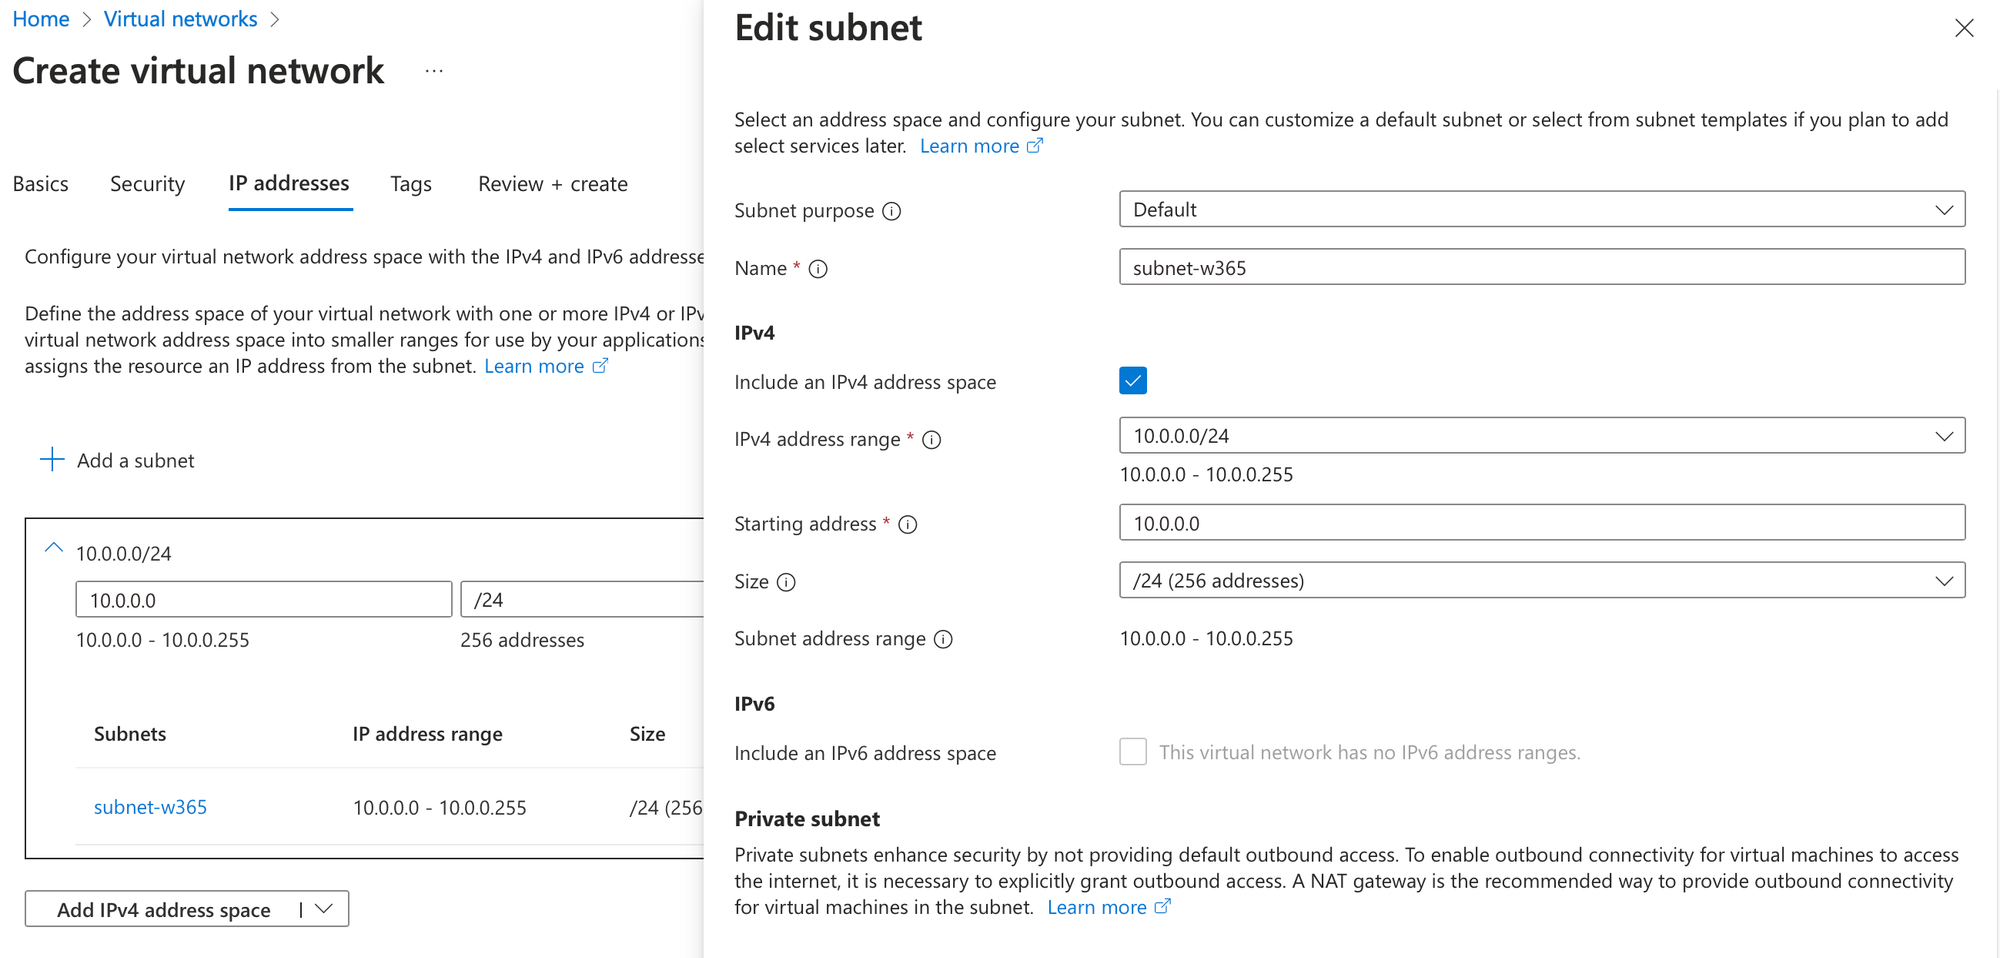
after the validation you can go ahead an create the virtual network.
🔧 Step 2: Initial configuration of Windows 365
Navigate to the Intune portal > Devices > Windows 365
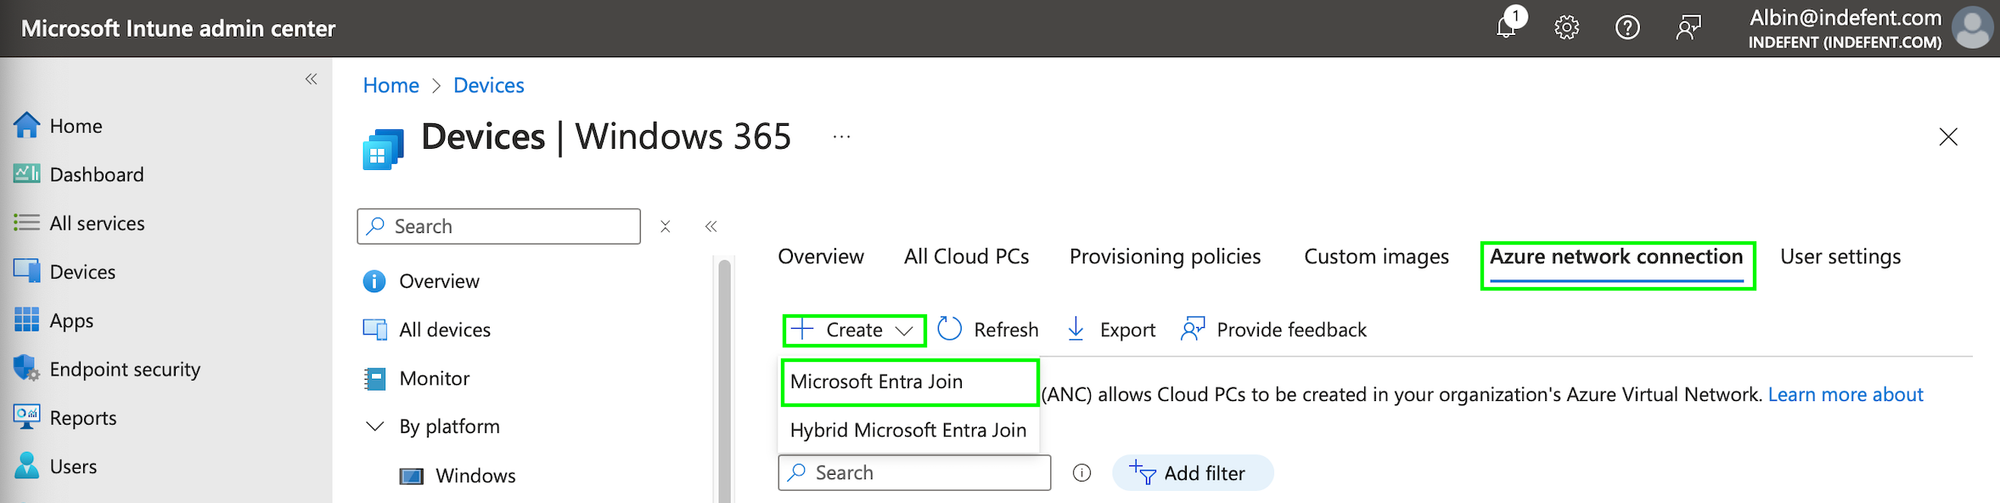
As we know the way to go is Entra Joined we follow that path and create the Azure network connection with the resources we created in the previous step:
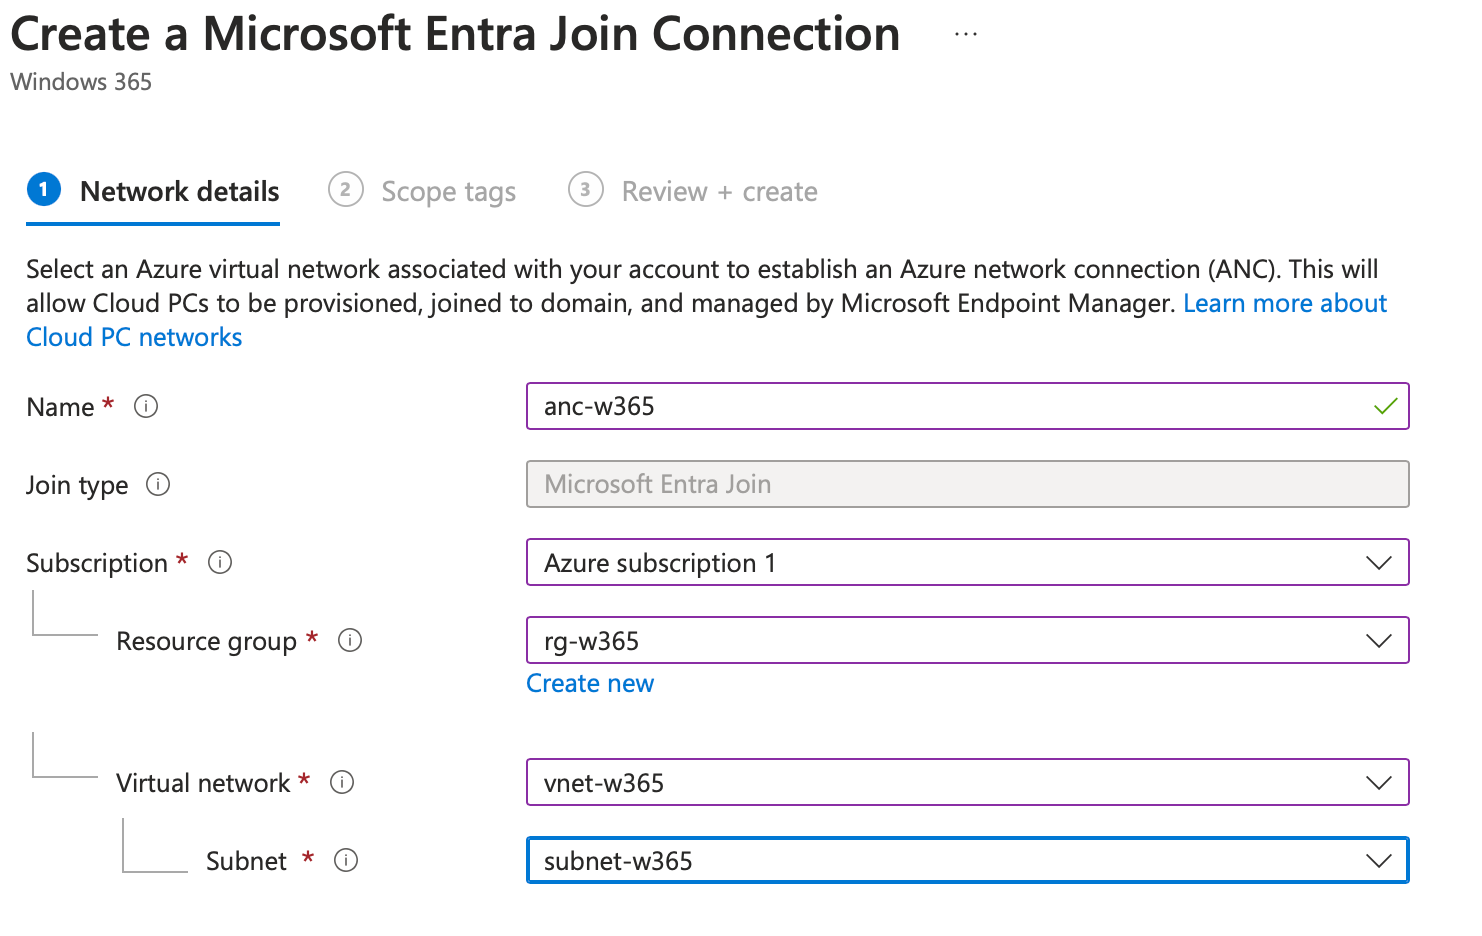
After that go ahead and review it an create it. Now it can take some time, while the checks are being run:

Before we go ahead, those checks have to be completed... coffee time... ☕️

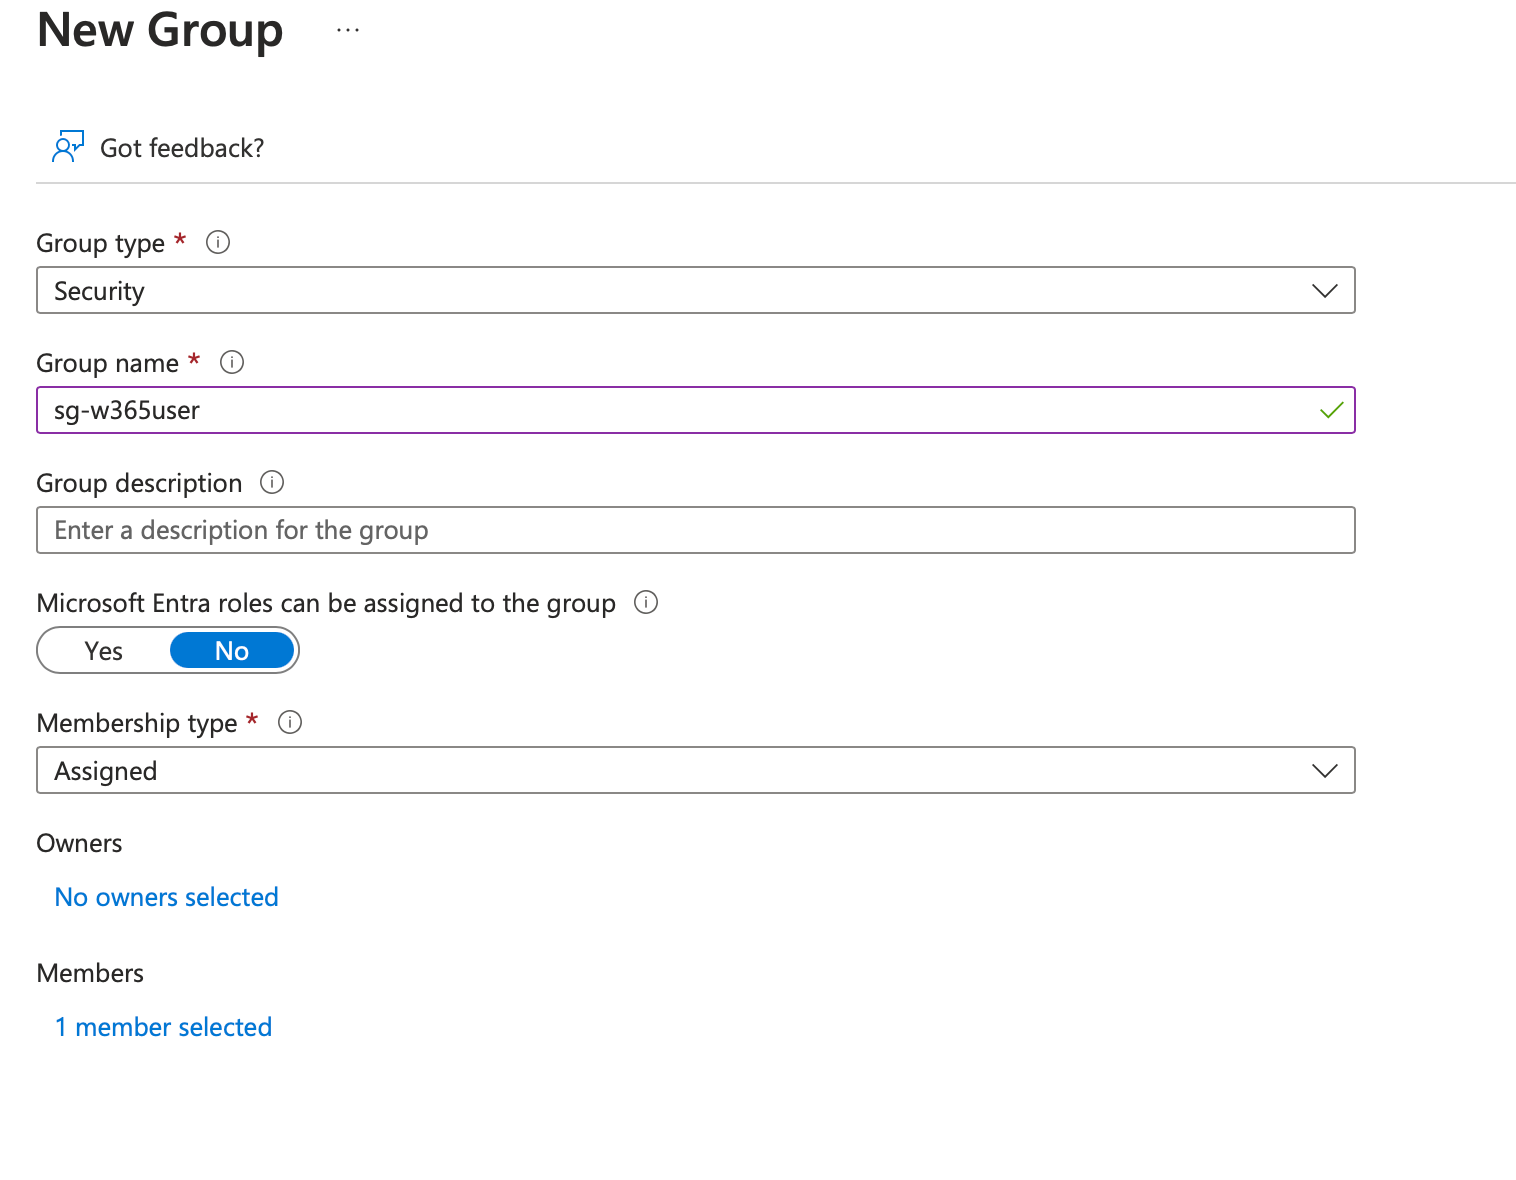
In the meantime, create a group with those users you want to receive the provisioning policy we are about to configure - thank me later, as you don't have to close the configuration to create the group when you need it. 😎
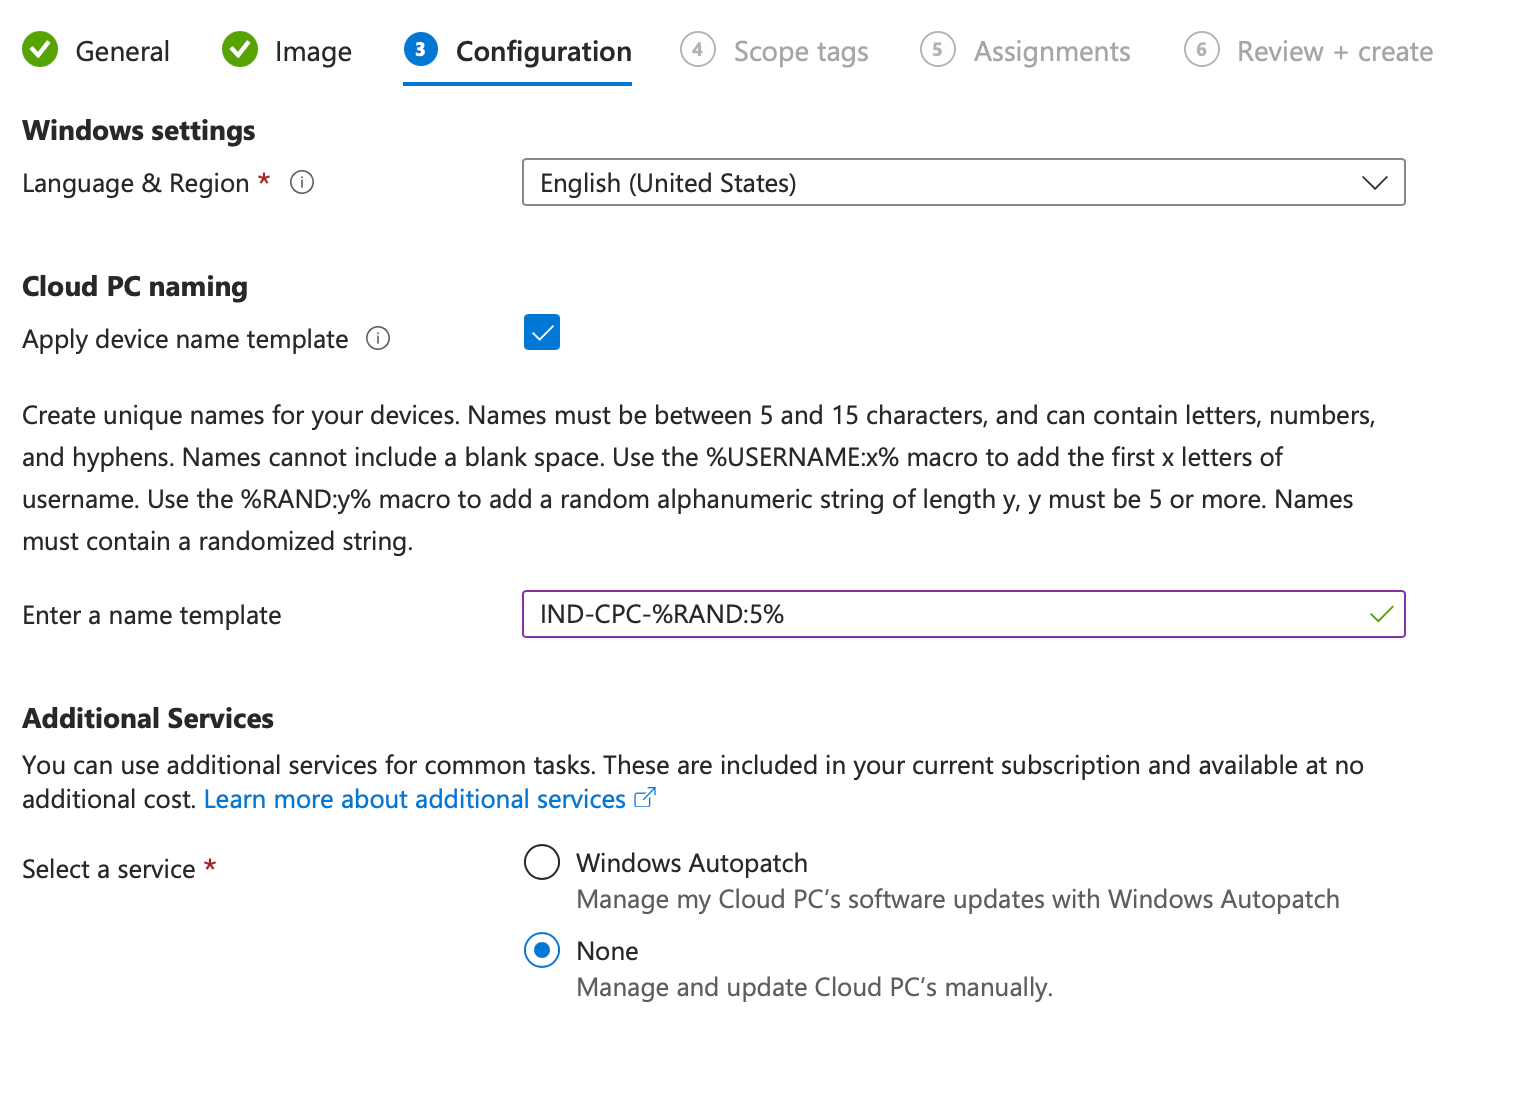
After the Checks have been successful, we can go ahead an create the Provision policies:
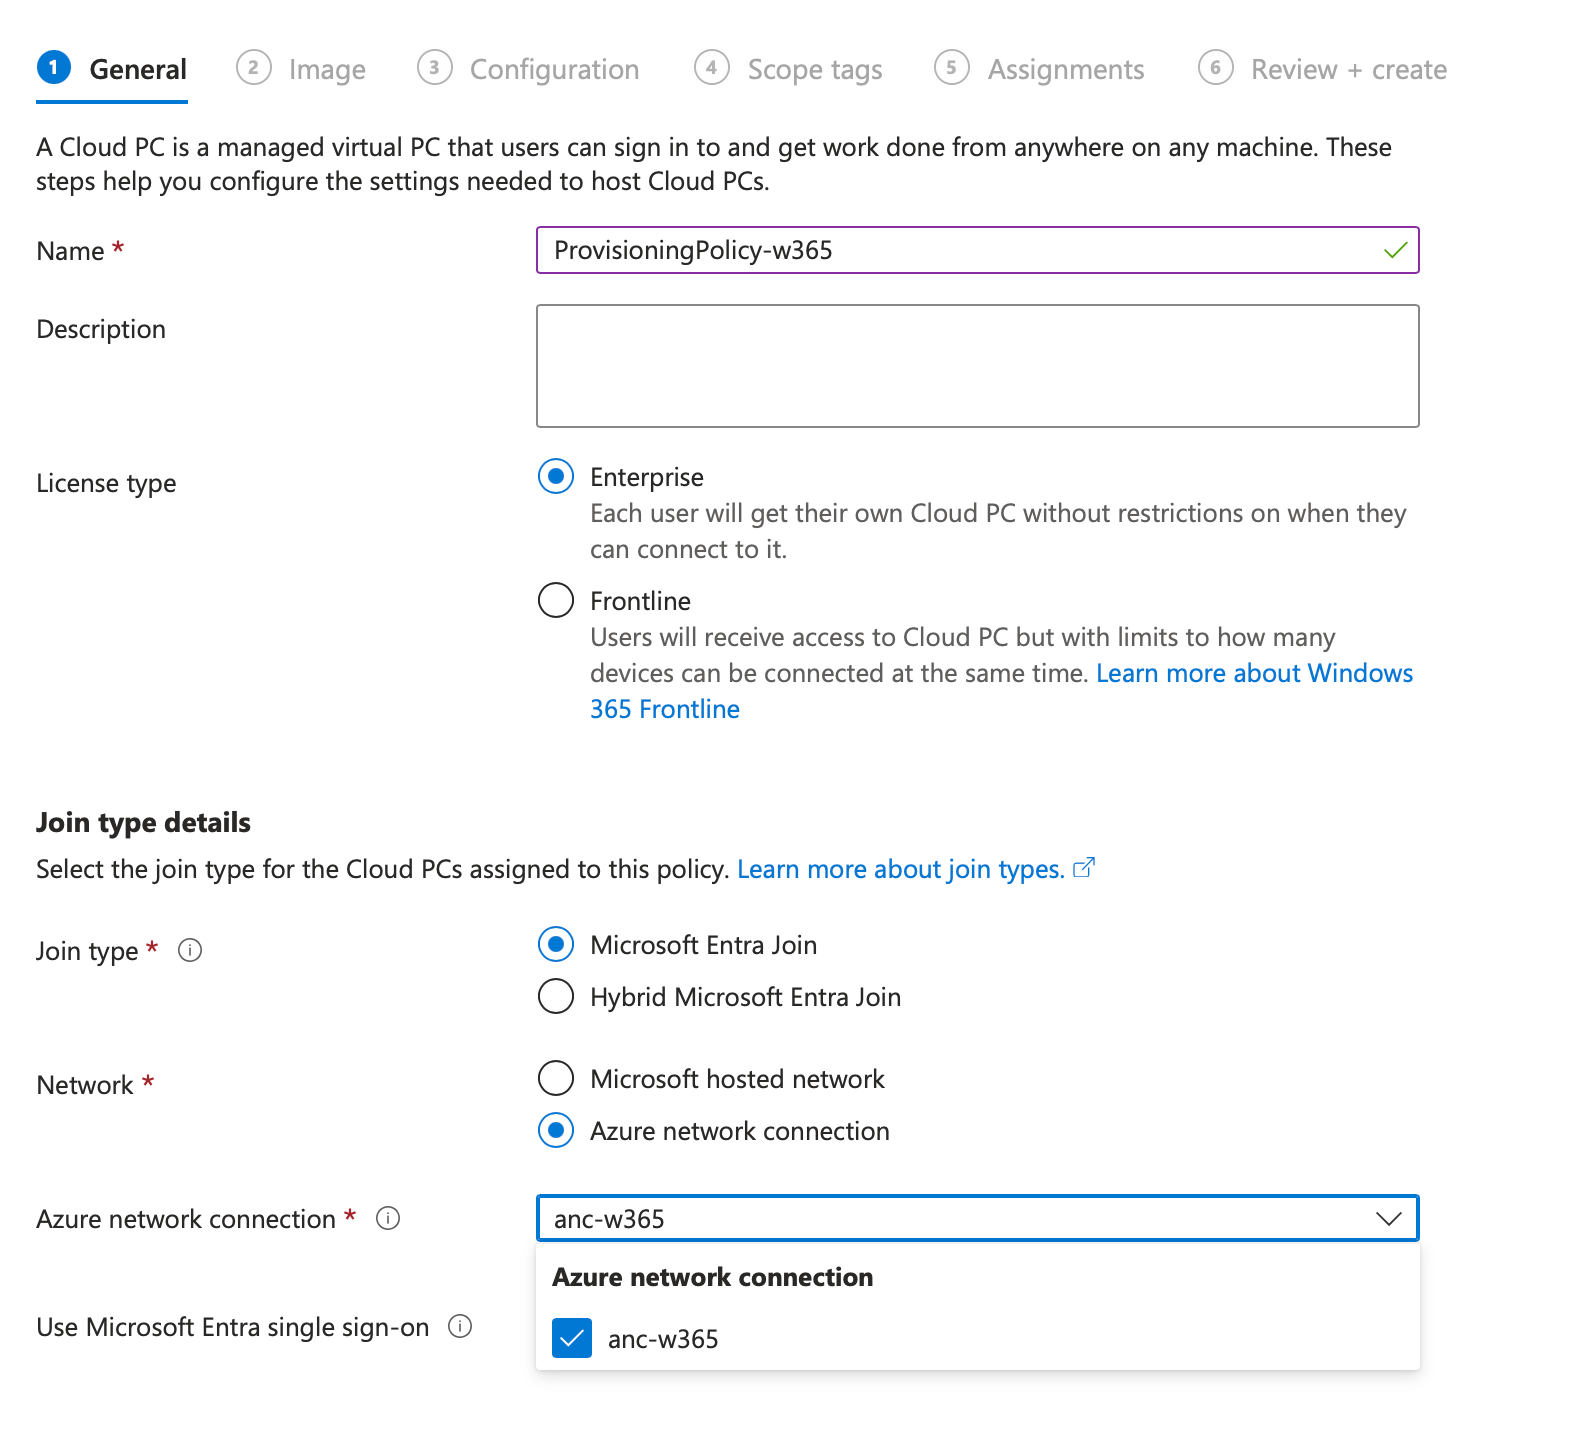
- Image I recommend using the gallery image for Windows 365 deployments
- Configuration Configure that as you like, that's my configuration:
- Assignments Assign the group we created while we waited for the ANC checks to complete - in my case that's sg-w365user
Go ahead and after that create the Policy.
Now we can assign our user the Windows 365 License:
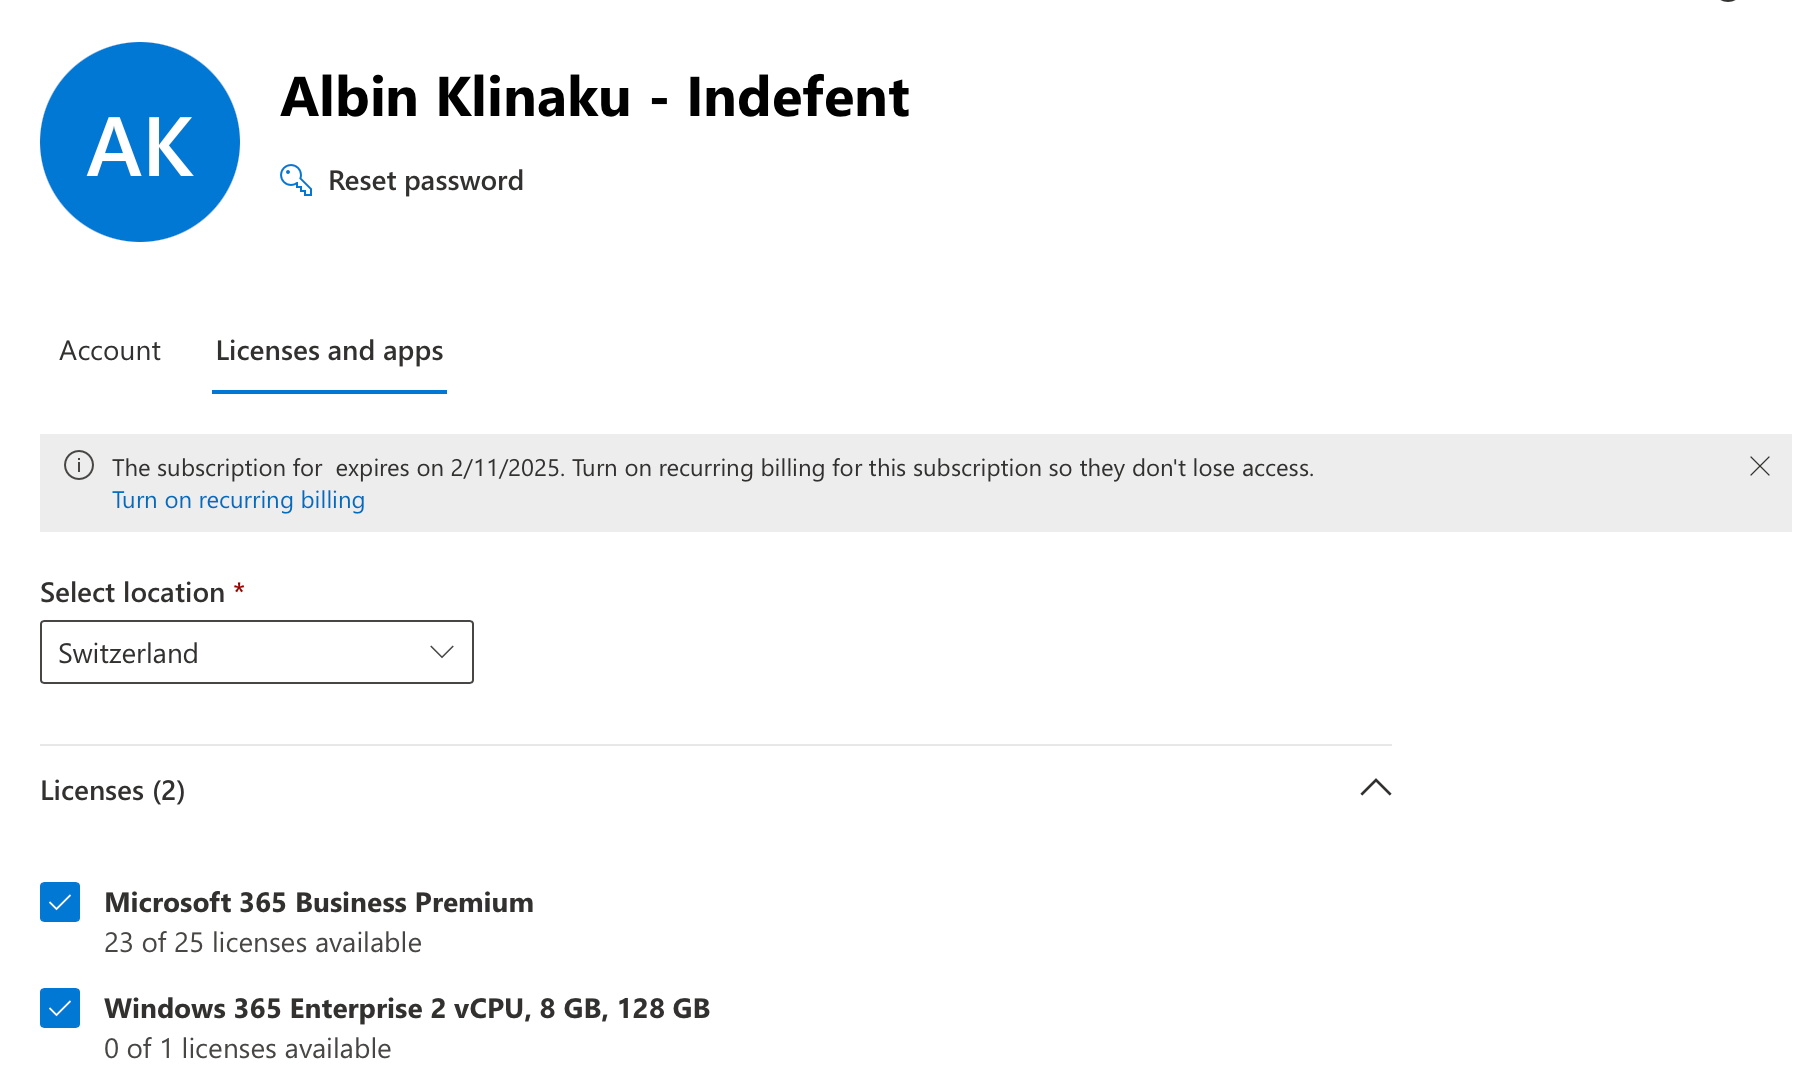
Don't forget, as we need to use Intune with Windows 365, that the users have the appropriate Intune License as well, in my case Business Premium.
After you assigned the license go back to Intune portal > Devices > Windows 365
You should now see the Cloud PCs being provisioned for your selected users which you made a group member of the assigned group
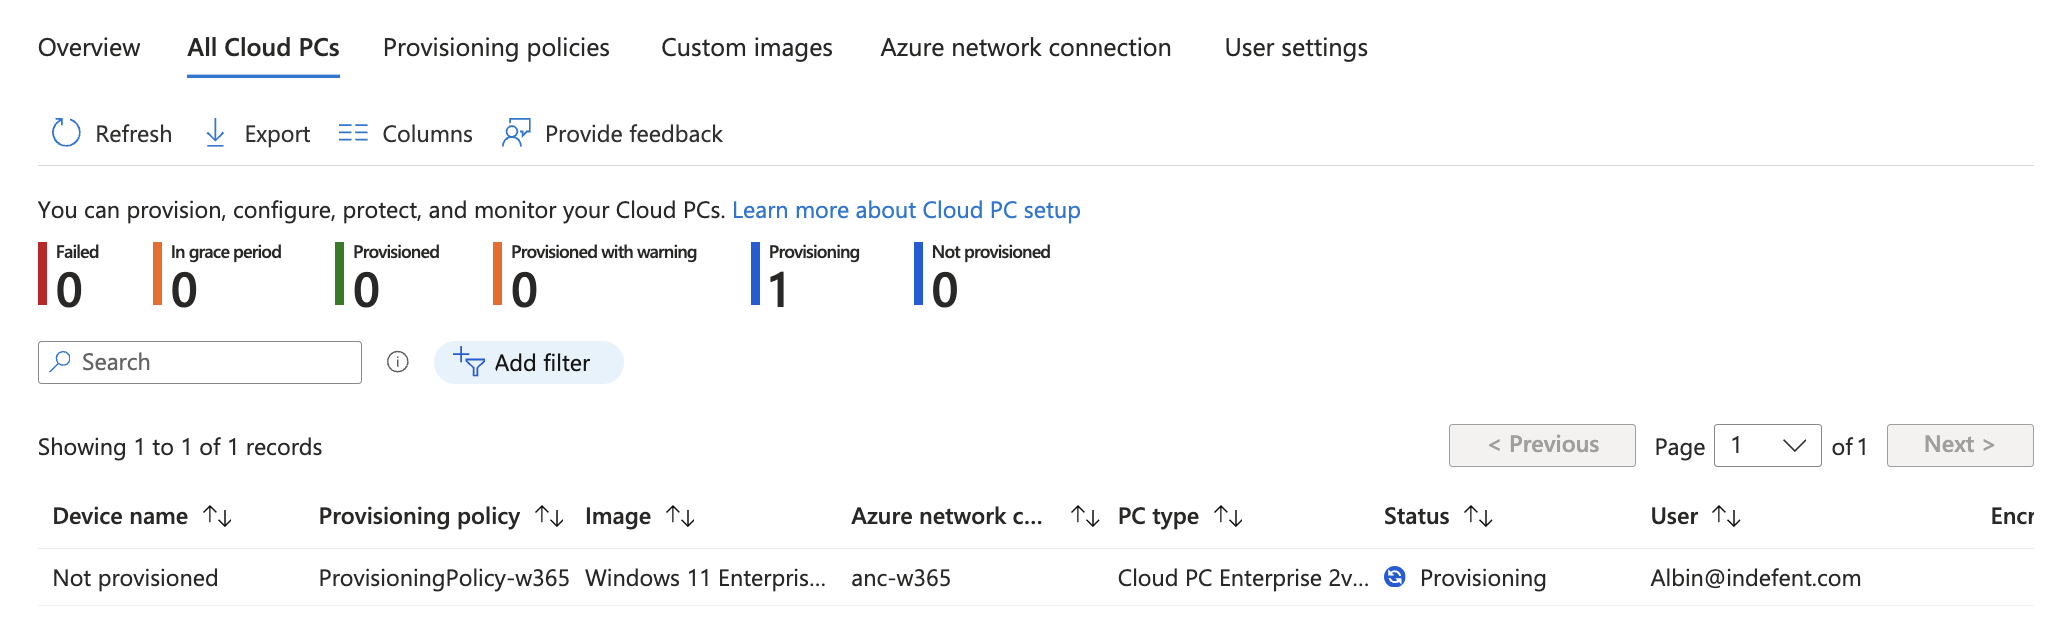
Before we go ahead, now the Cloud PC has to be provisioned...

After the Cloud PC has been provisioned you should be able to connect onto it either through the Web or the Windows App:
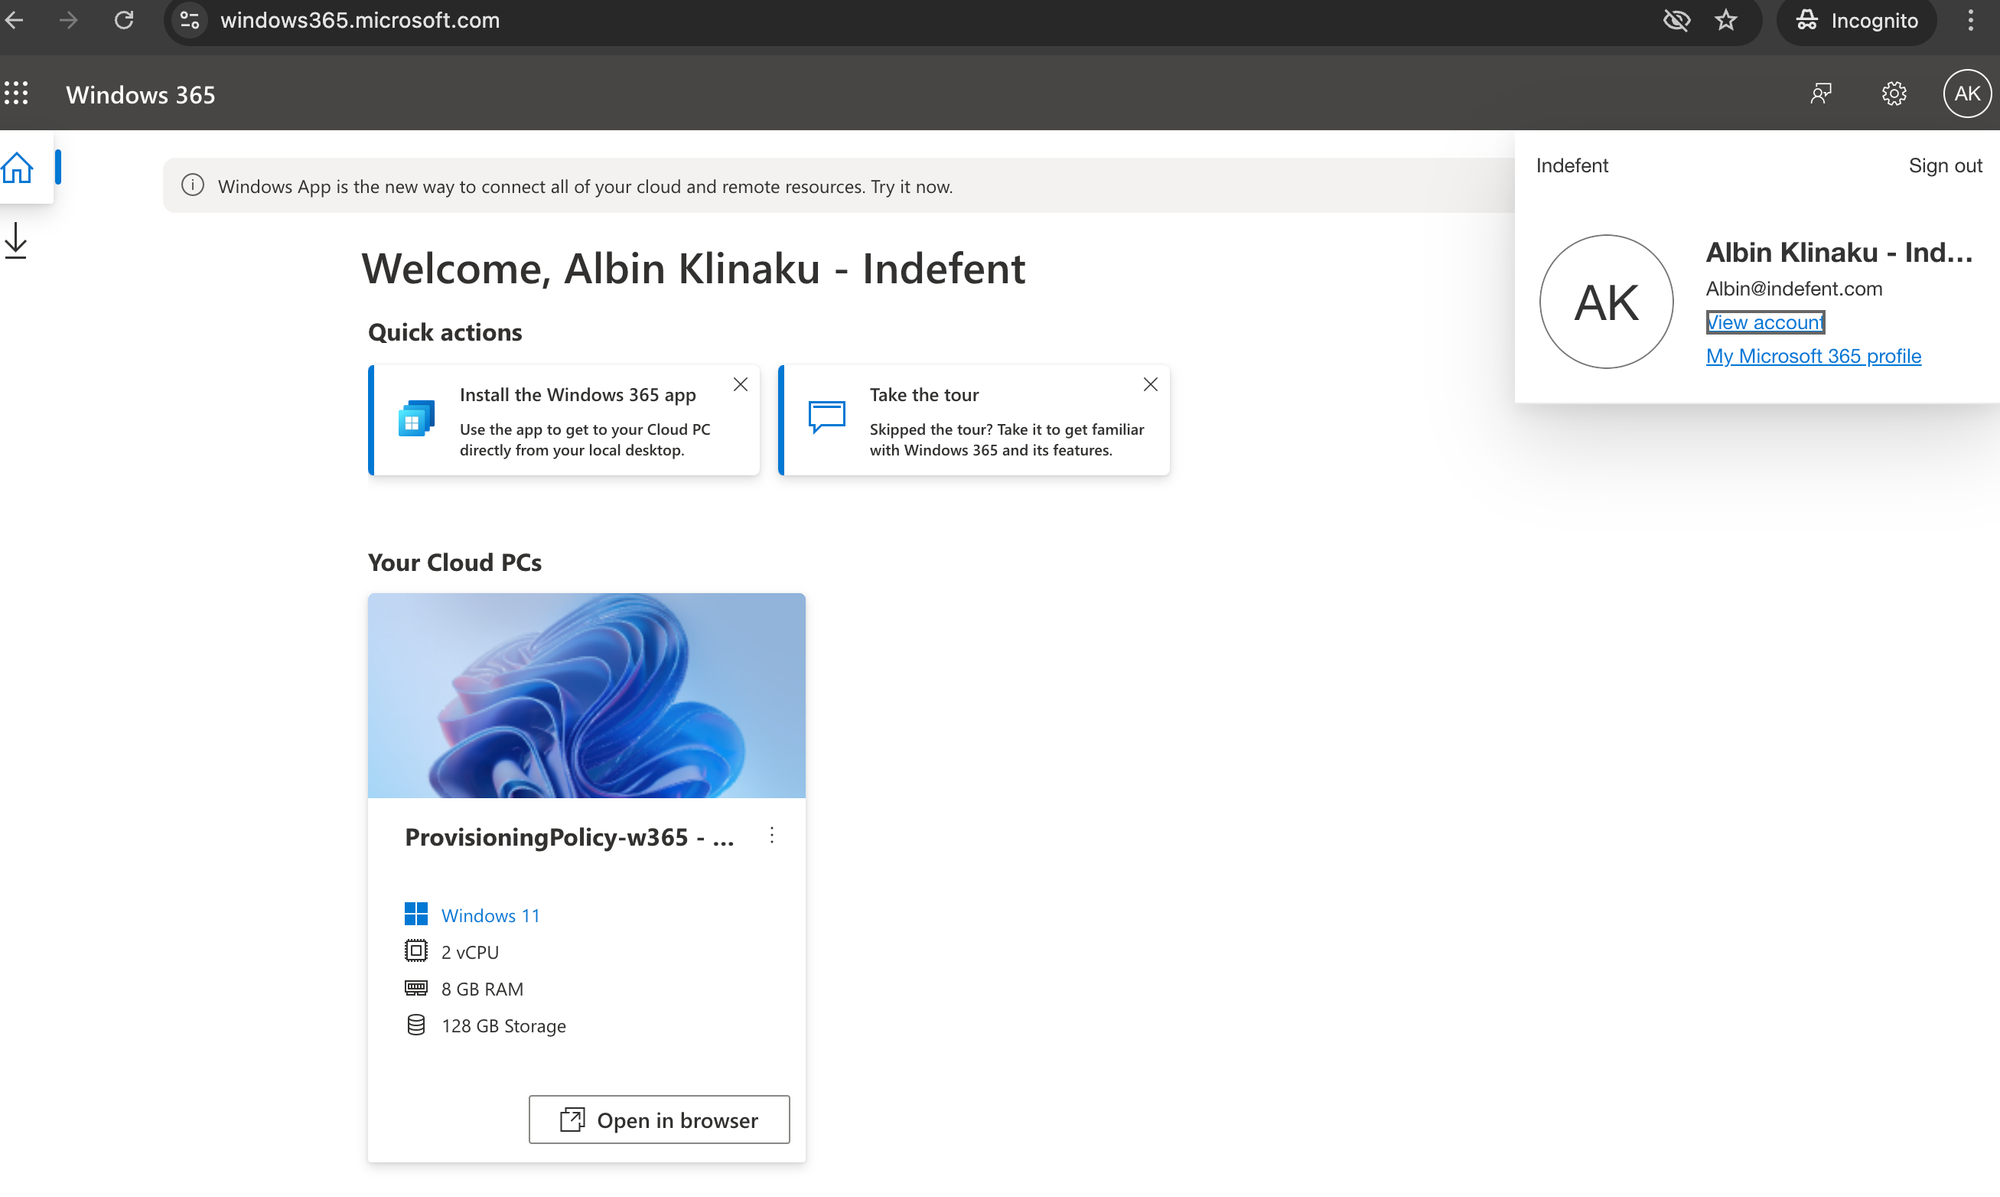
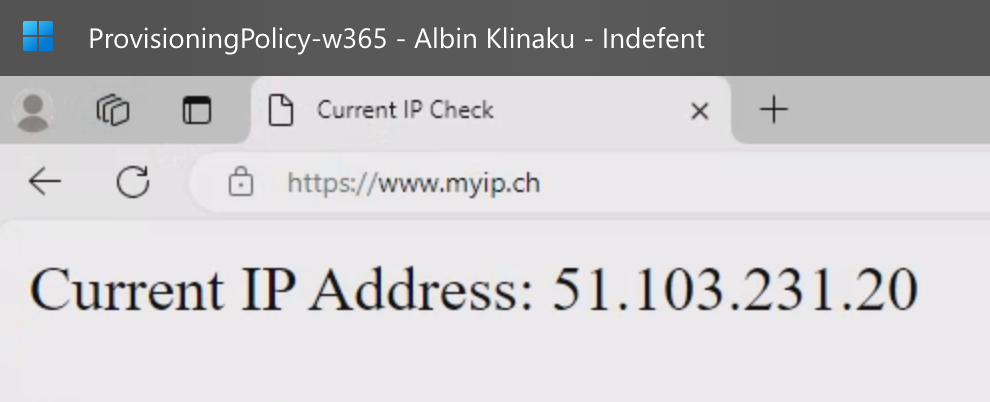
Now, lets login and check our WAN-IP:
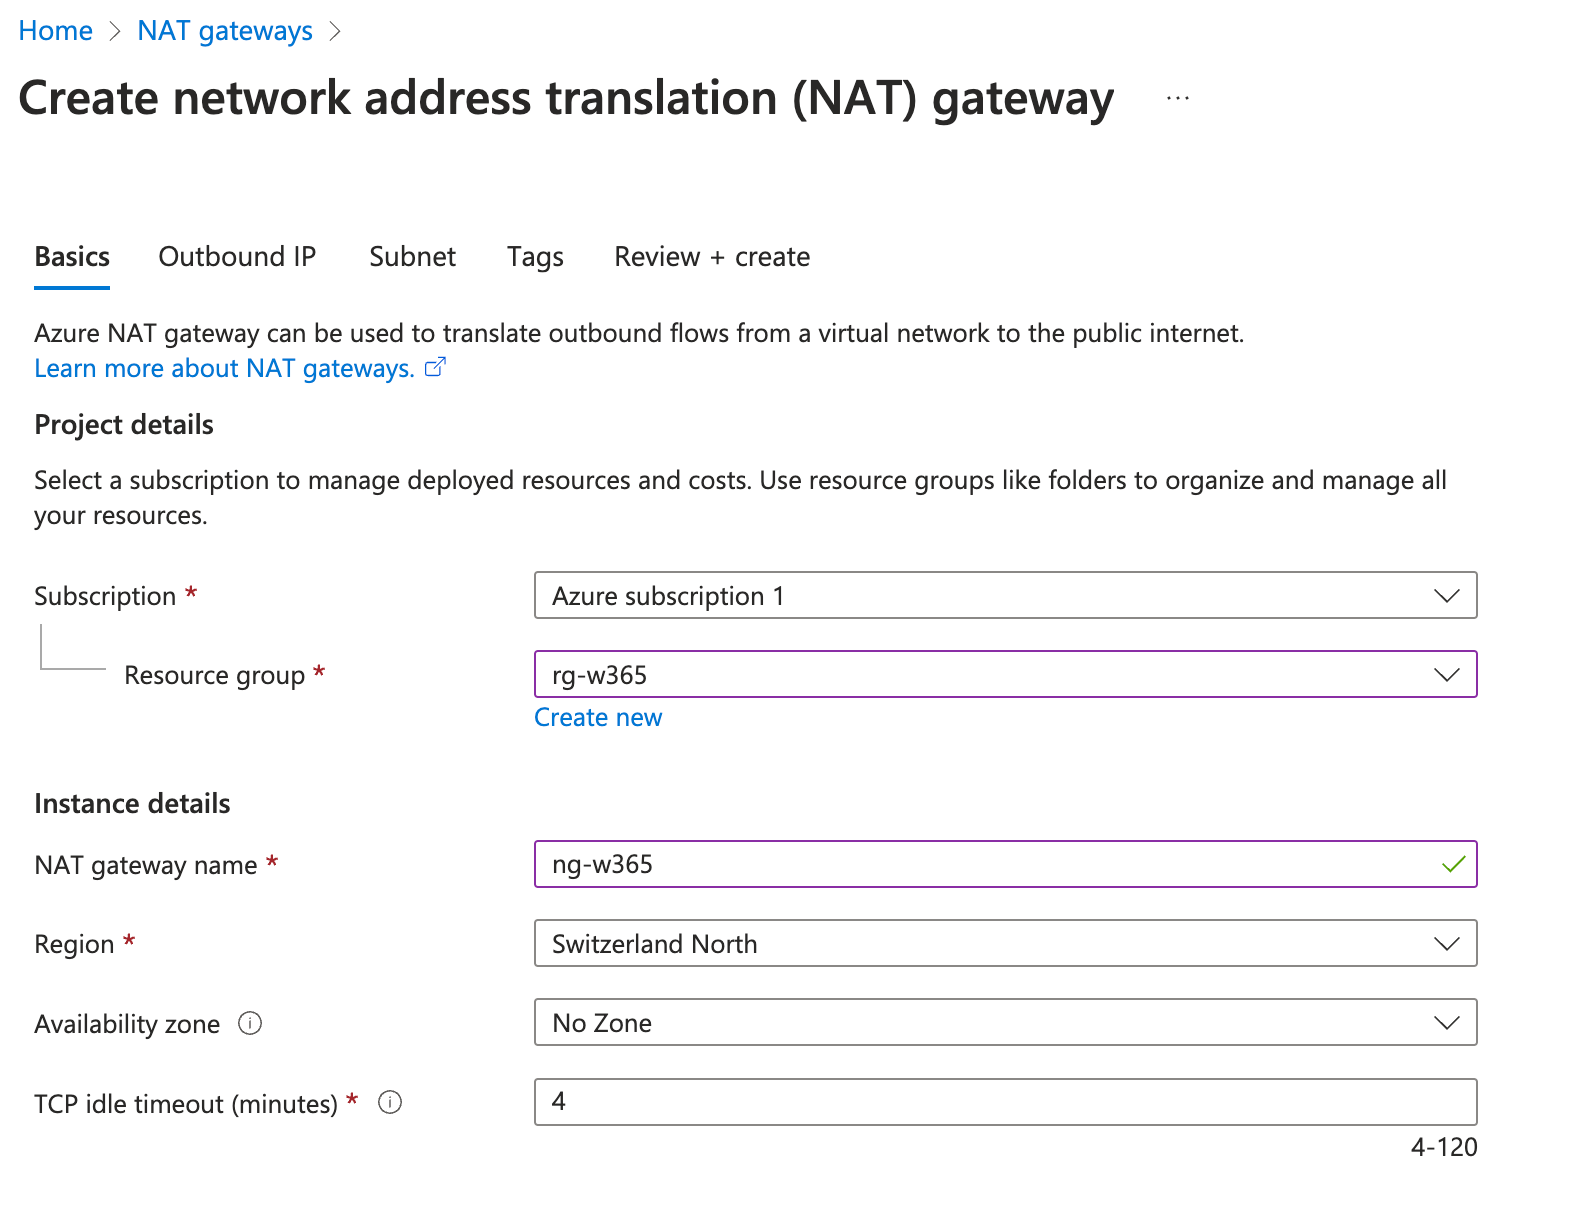
🔧 Step 3: Configure the NAT gateway
Navigate to the Azure portal > NAT gateway > Create
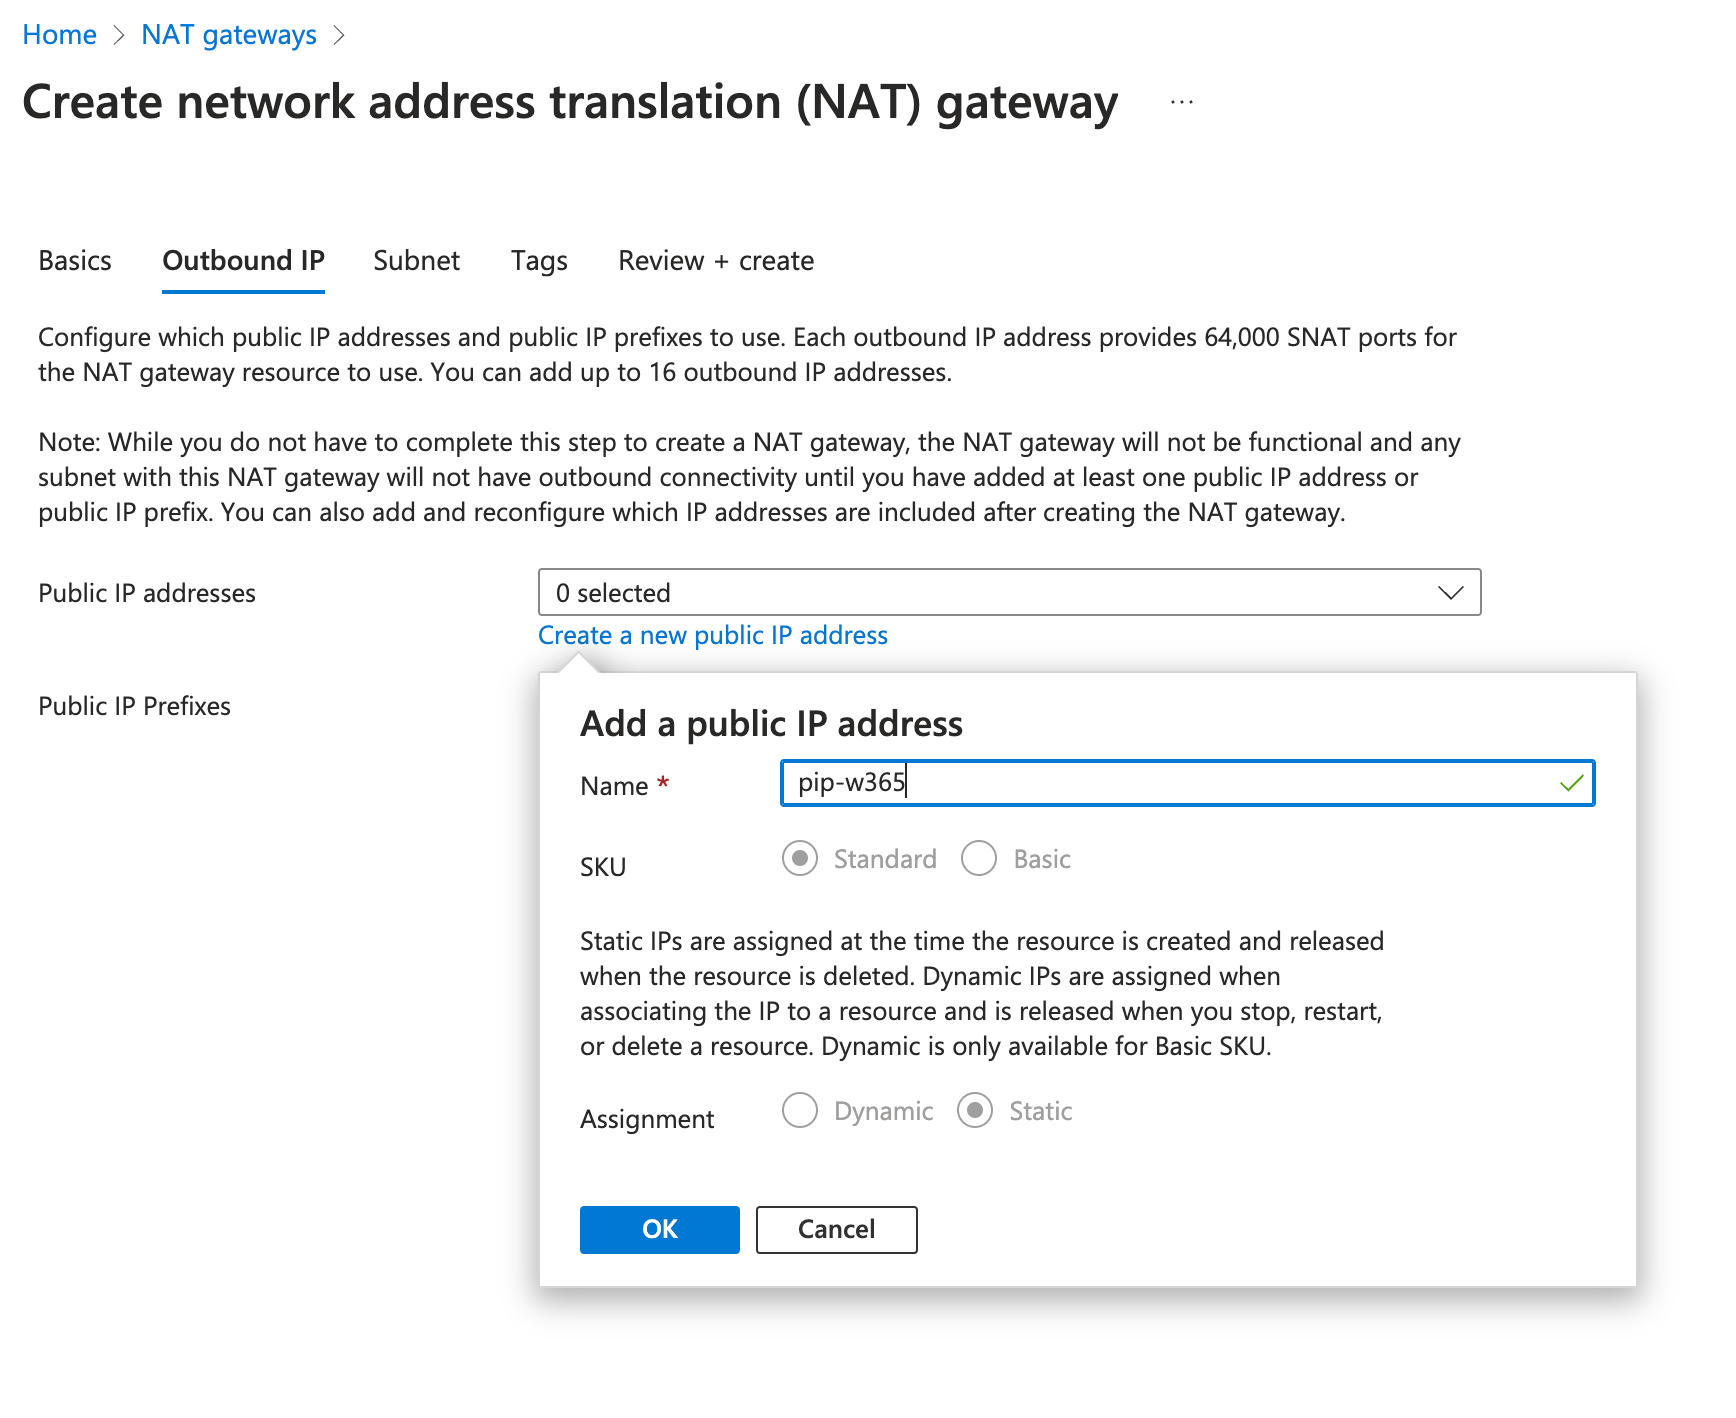
- Outbound IP Create an Outbound IP which should be used
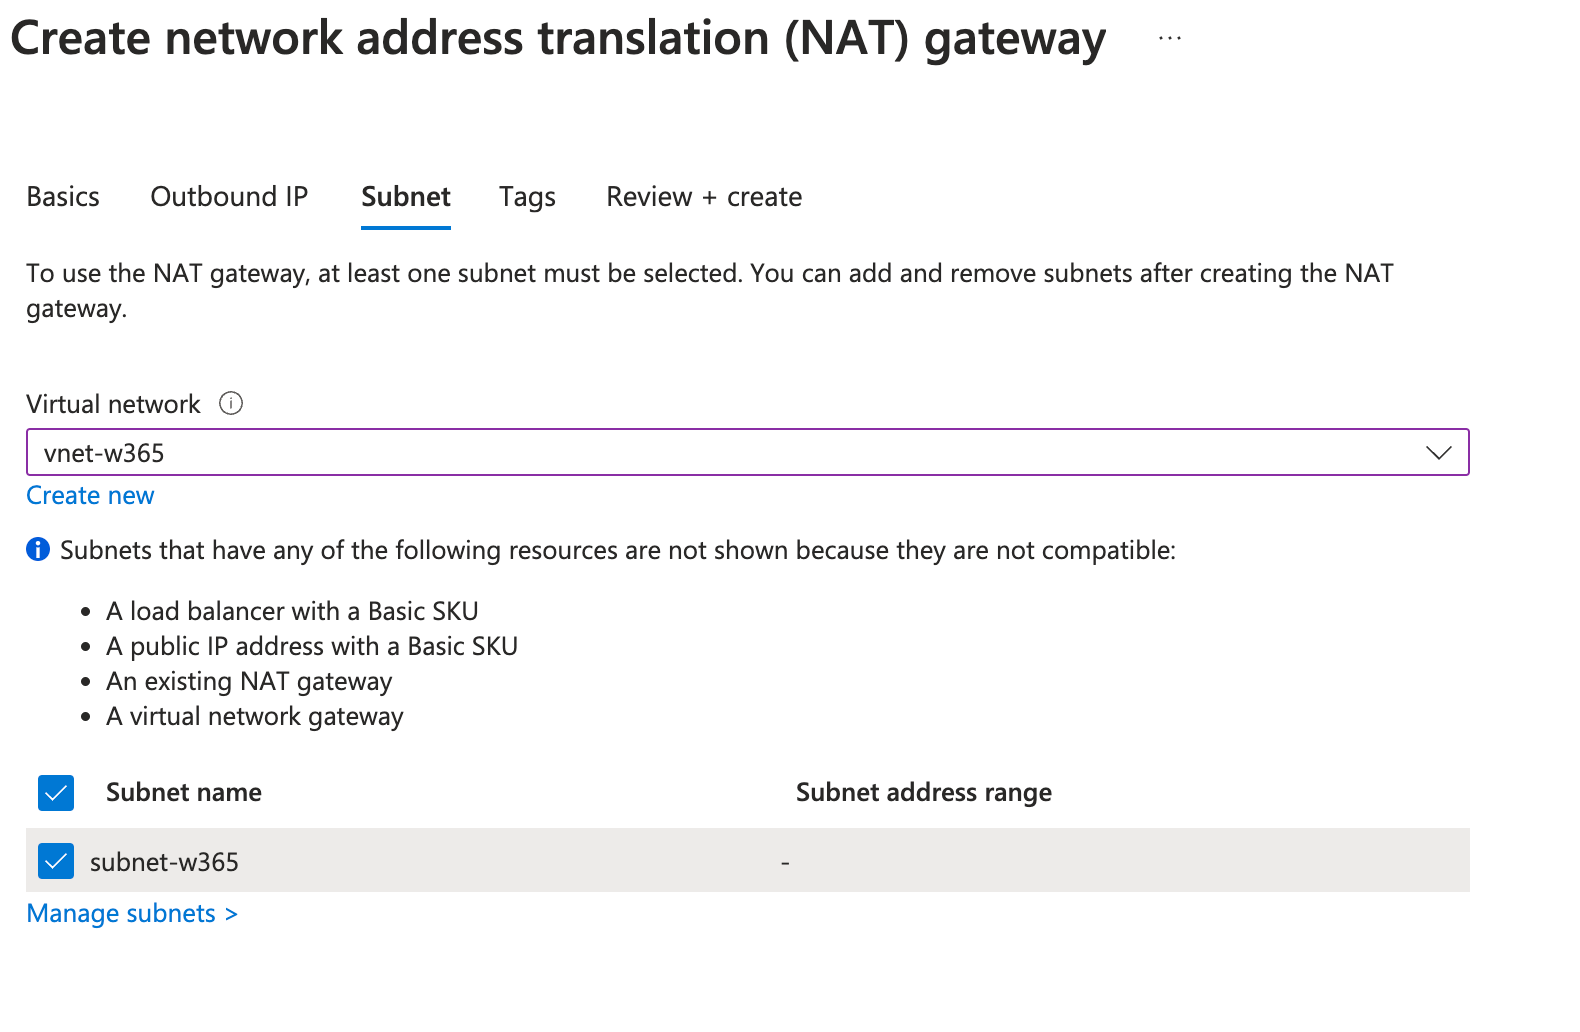
- Subnet Select the VNet and the Subnet we created
Keep in mind that after you hit the button "review and create" your users will notice a very short connection loss for several seconds.
🔧 Step 4: Configuring the Conditional Access Policy
Let's go ahead and create now our lock down Conditional Access Policy. Firstly you should create a named location with our received public IP.
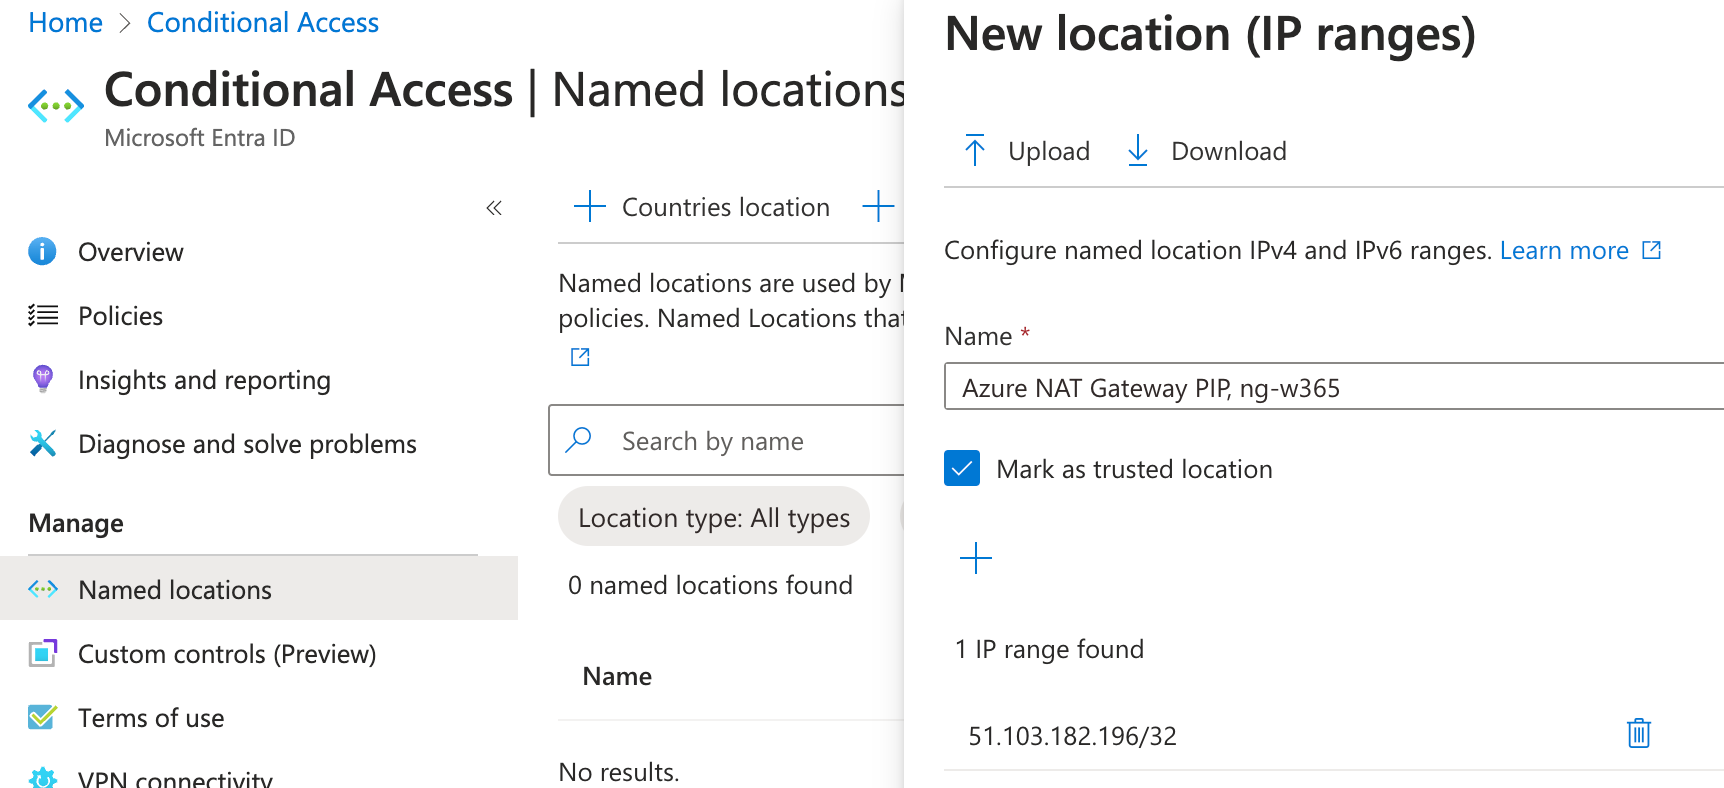
After creating the named location we are now able to create the conditional access policy
CA09-AtlassianLockDown
- Users All Users
- Target resources Include, Select resources, Atlassian Cloud
- Network
- Include, Any network or location
- Exclude, Selected networks and locations, Azure NAT Gateway PIP, ng-w365
- Conditions Locations (Is preselected)
- Sessions 0 controls selected
- Grant Block Access
- Enable policy Report-only for testing, On if you want to enable
🔎 Validation and Testing
Once you've created the NAT gateway configuration, it’s crucial to validate that everything works as expected. Here’s how to test your setup:
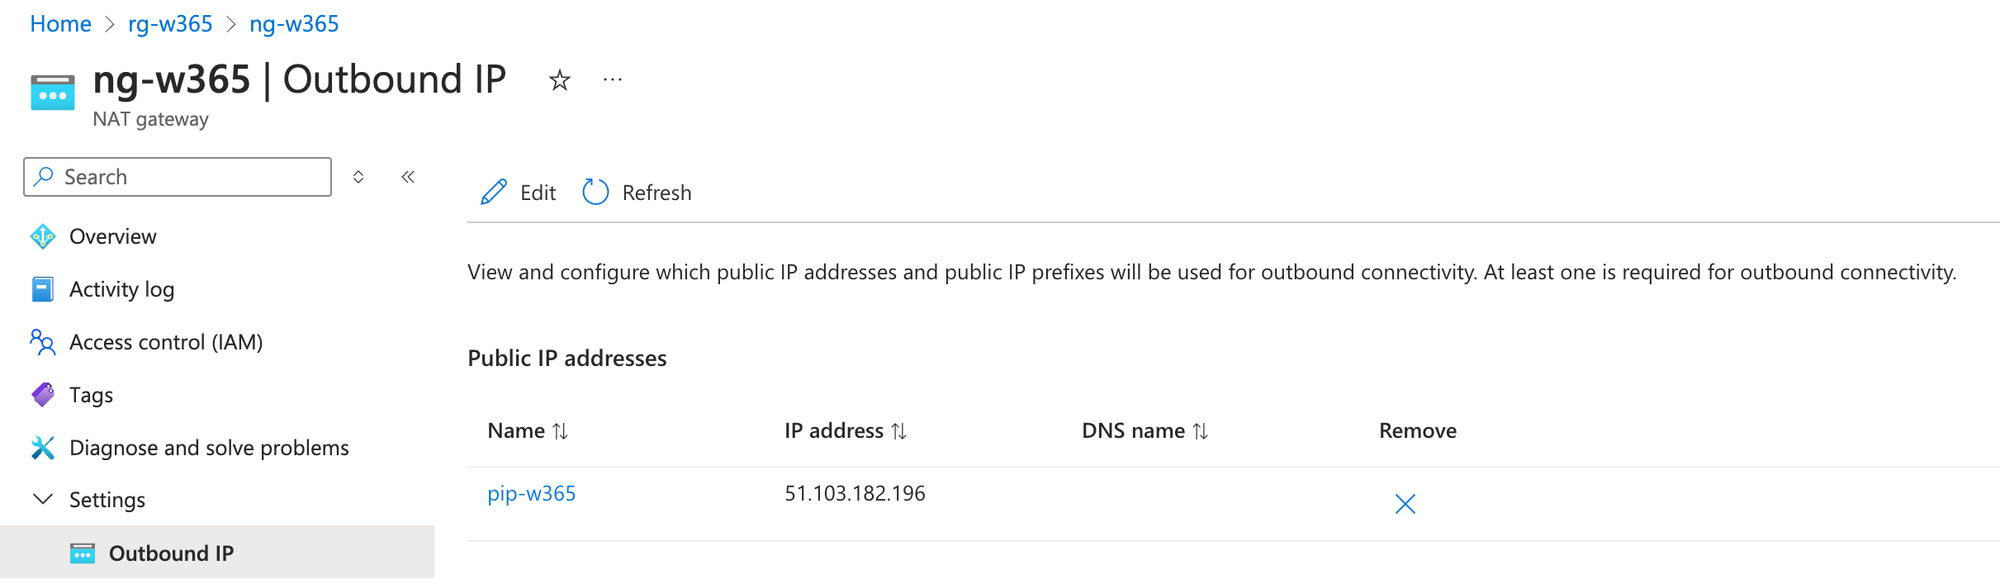
Firstly check your NAT gateway and the Public IP you received
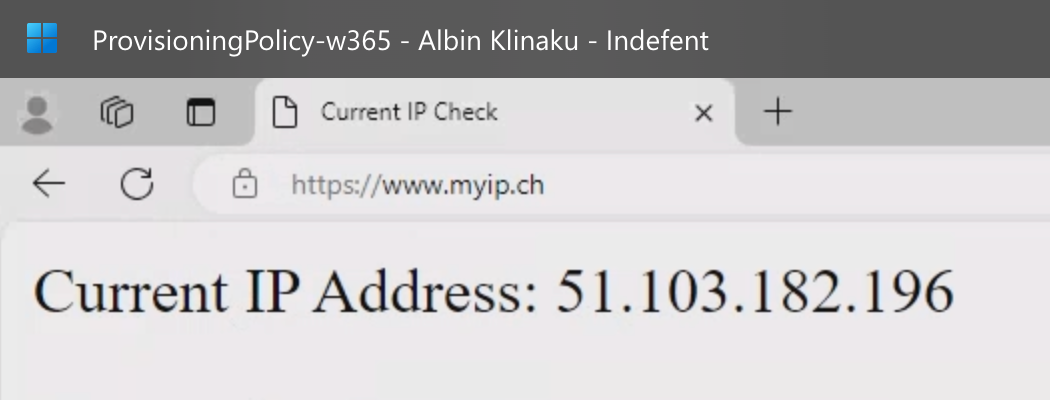
Now its time to verify the Public IP on the Cloud PC
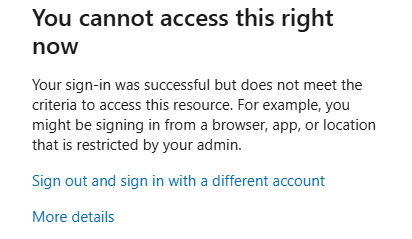
Accessing now from my local PC with an unspecified IP results in
Login into Atlassian Cloud over SSO over the Windows 365 Cloud PC results now in a successful login.

📝 Summary
Let’s recap what we covered in this post:
- Initial Azure configuration
- Initial configuration of Windows 365
- Configure the NAT gateway
- Creating a conditional access policy
So now we see the magic, the public IP changed to the IP we received of the resource pip-w365. Now every Cloud PC which is deployed for Users in the selected group sg-w365user through the created Provisioning Policy ProvisioningPolicy-w365 are put in the same subnet and communicate over the public IP we defined in the NAT gateway.
⚠️ Disclaimer
The configurations shared in this post reflect my personal approach to solving this specific challenge. Every environment is unique, so adapt these solutions to fit your needs.
Happy configuring! 😊


